Appearance
Fleet Management
Fleet management tracks your entire vehicle inventory - every vehicle's status, condition, location, and maintenance history.
Viewing your fleet
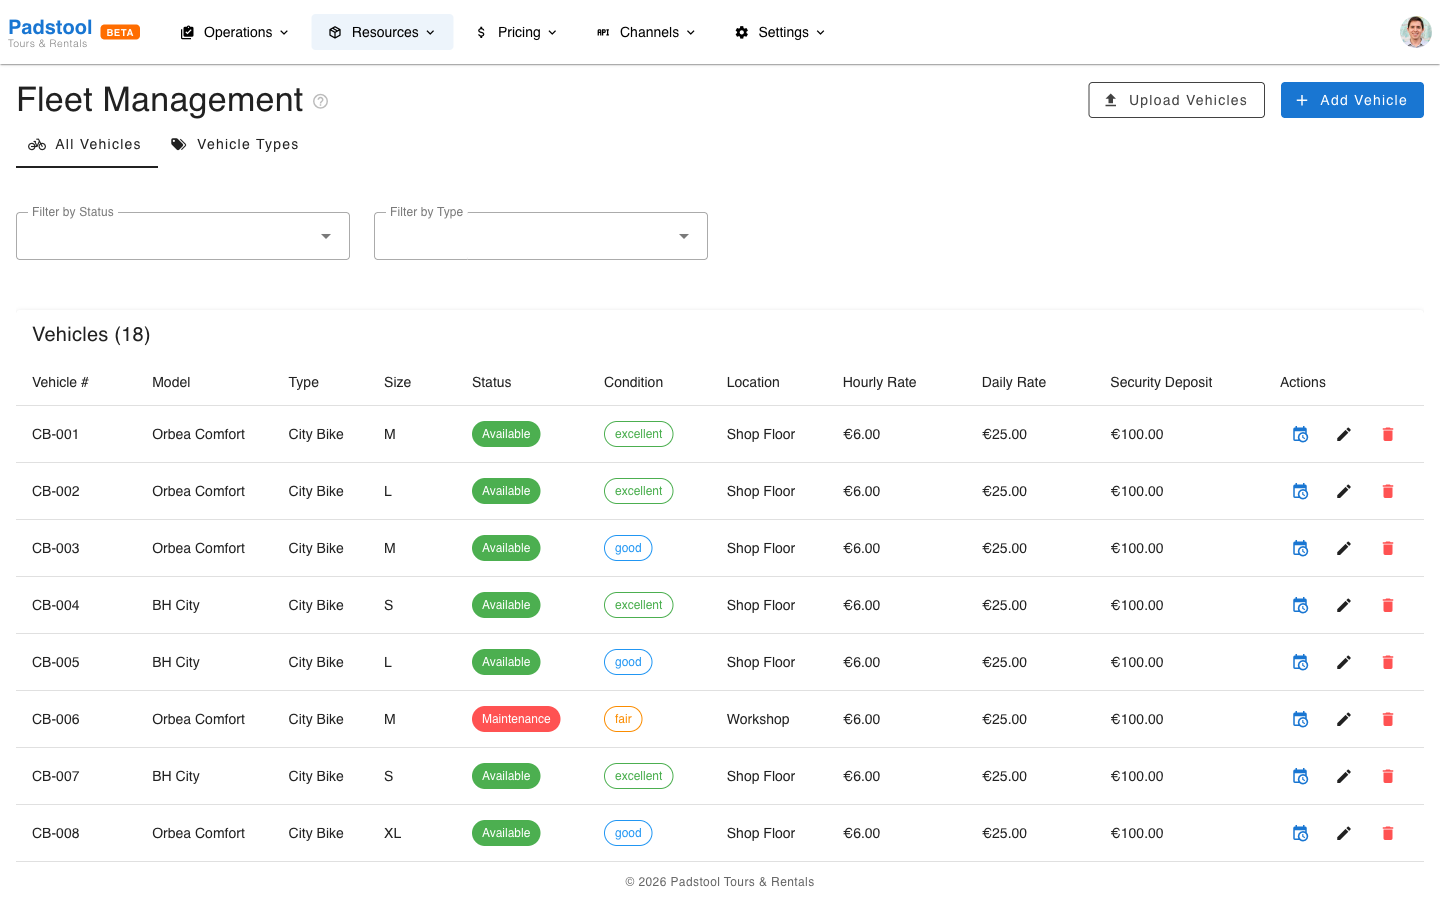
Navigate to Resources > Fleet. The page has two tabs:
- All Vehicles - Your complete inventory with status, condition, and location.
- Vehicle Types - The categories of vehicles you offer (e.g., City Bike, E-Bike, Tandem).
Use the filters to find specific vehicles by type, status, condition, or location.
Adding a single vehicle
- Navigate to Resources > Fleet.
- Click Add Vehicle.
- Fill in the vehicle details:
- Vehicle number - A unique identifier (e.g., "CB-001", "EB-003").
- Vehicle type - Select from your configured types (City Bike, E-Bike, Tandem, Kids Bike).
- Model - The manufacturer and model name (e.g., "Orbea Comfort").
- Size - Frame size (S, M, L, XL, or One Size for tandems).
- Status - Current availability status.
- Condition - Current physical condition.
- Location - Where the vehicle is stored (e.g., "Shop Floor", "Workshop").
- Properties - Type-specific fields like gear count, battery capacity, or wheel size.
- Click Save.
Batch create vehicles
If you need to add several vehicles of the same type quickly - and don't have specific serial numbers or model details yet - use the Create Vehicle Batch shortcut.
- Navigate to Resources > Fleet and open the Vehicle Types tab.
- Find the vehicle type you want to add vehicles for and click the batch create icon in the Actions column.
- Set the quantity (up to 50 at a time).
- Choose a number prefix (e.g., "CB" for City Bikes) - vehicles are numbered automatically as CB-001, CB-002, etc.
- Optionally set the start number, model, size, and condition.
- Click Create - all vehicles are created at once.
TIP
When you create a new vehicle type, a notification appears offering to Create batch of vehicles for that type right away - a handy shortcut for initial setup.
This is the fastest way to populate your fleet. You can always edit individual vehicles later to add specific model names, serial numbers, or properties.
Bulk CSV upload
For adding many vehicles at once with specific details per vehicle - use the CSV upload feature.
- Navigate to Resources > Fleet.
- Click Upload Vehicles.
- Download the template CSV file for reference.
- Prepare your CSV with the required columns:
vehicle_number- Unique identifiervehicle_type- Must match an existing vehicle type namemodel- Manufacturer and modelsize- Frame sizestatus- available, maintenance, or retiredcondition- excellent, good, fair, or needs_repairlocation- Storage location
- Upload the file.
- Review the validation results - the system flags any errors before importing.
- Confirm the import.
INFO
The CSV upload validates each row before importing. Rows with errors (duplicate vehicle numbers, invalid types) are skipped, and valid rows are imported. You will see a summary of successes and failures.
Vehicle status lifecycle
Each vehicle has a status that reflects its current availability:
| Status | Meaning | Available for booking? |
|---|---|---|
| Available | Ready for use | Yes |
| Rented | Currently checked out to a customer | No |
| On Tour | Assigned to an active tour | No |
| Maintenance | In the workshop for repairs | No |
| Retired | Permanently out of service | No |
Status changes automatically for some transitions (e.g., a vehicle moves to "Rented" when checked out) and manually for others (e.g., moving a vehicle to "Maintenance").
Live status indicators
The Status column in the fleet list shows real-time information about each vehicle:
- Rented - Hover over the status to see a tooltip with the customer name, booking number, and rental end date.
- On Tour - A badge shows the tour name. Hover to see the time slot and assigned guide name.
These indicators help you quickly understand where each vehicle is and when it will be available again.
View schedule
Each vehicle has a View Schedule button (calendar icon) in the Actions column. Click it to open a calendar showing all tours the vehicle is assigned to, helping you plan maintenance around bookings.
Condition tracking
Track the physical condition of each vehicle:
| Condition | Description | Action needed |
|---|---|---|
| Excellent | Like new, no issues | None |
| Good | Normal wear, fully functional | Monitor |
| Fair | Visible wear, still operational | Schedule maintenance soon |
| Needs Repair | Issues that affect usability | Move to maintenance |
Update condition after each rental return or during routine inspections.
Vehicle types
Before adding vehicles, you need to create your vehicle types. These define the categories of vehicles you offer, each with their own rental rates and properties.
- Navigate to Resources > Fleet and open the Vehicle Types tab.
- Click Add Vehicle Type.
- Set the name, display name, hourly rental rate, daily rental rate, and security deposit.
- Optionally define custom property fields (e.g., battery capacity for E-Bikes, wheel size for Kids Bikes).
Here is an example setup:
| Type | Hourly Rate | Daily Rate | Security Deposit |
|---|---|---|---|
| City Bike | €6.00 | €25.00 | €100.00 |
| E-Bike | €12.00 | €45.00 | €200.00 |
| Tandem Bike | €10.00 | €40.00 | €150.00 |
| Kids Bike | €4.00 | €15.00 | €50.00 |
Custom properties
Each vehicle type can have custom property fields that capture details specific to that type. When you add a vehicle of that type, you'll be prompted to fill in these fields.
Field types available:
| Type | Use case | Example |
|---|---|---|
| Text | Free-form info | Model name, color |
| Number | Numeric specs | Battery capacity (Ah), wheel size (inches) |
| Boolean | Yes/no flags | Has basket, has child seat mount |
| Select | Pick from a list | Frame size (S, M, L, XL) |
Example setup by vehicle type:
- E-Bike: Battery Capacity (number, required), Range km (number), Has Display (boolean)
- City Bike: Frame Size (select: S/M/L/XL), Gear Count (number)
- Kids Bike: Wheel Size (select: 16/20/24 inch), Has Training Wheels (boolean)
- Tandem: Seats (number, default: 2)
TIP
Mark a property as Required if it must be filled in for every vehicle of that type. Optional properties are useful for details that vary or may not always be known.
Hamburg Bike Tours fleet
Here is the fleet composition for reference:
| Type | Count | Models |
|---|---|---|
| City Bike | 8 | Orbea Comfort, BH City |
| E-Bike | 5 | Orbea Keram, BH Atom |
| Tandem | 2 | KHS Tandemania |
| Kids Bike | 3 | Orbea MX 20, Orbea MX 24, BH Junior |
| Total | 18 |
Tips
- Use a consistent naming convention for vehicle numbers (e.g., "CB-" for City Bikes, "EB-" for E-Bikes) to make identification quick. Batch create does this automatically.
- For initial setup, use batch create for speed or CSV upload if you have specific model and serial details for each vehicle.
- Retire vehicles rather than deleting them to preserve booking history.
- Regular condition checks prevent surprises during rentals. Update conditions after every return.
- Keep the location field updated so staff can quickly find specific vehicles.
WARNING
Deleting a vehicle permanently removes it and its history. Use the Retired status instead to take a vehicle out of service while keeping its records intact.