Appearance
Manifests
The Manifests page is your day-of-tour operational hub. It shows all tour departures for a selected date with participant counts, guide assignments, and real-time check-in progress.
Navigate to Operations > Manifests to open the manifest list.
Manifest list
The manifest list shows every tour departure for the selected date. Each card displays the tour name, start time, capacity bar, guide count, and check-in progress.
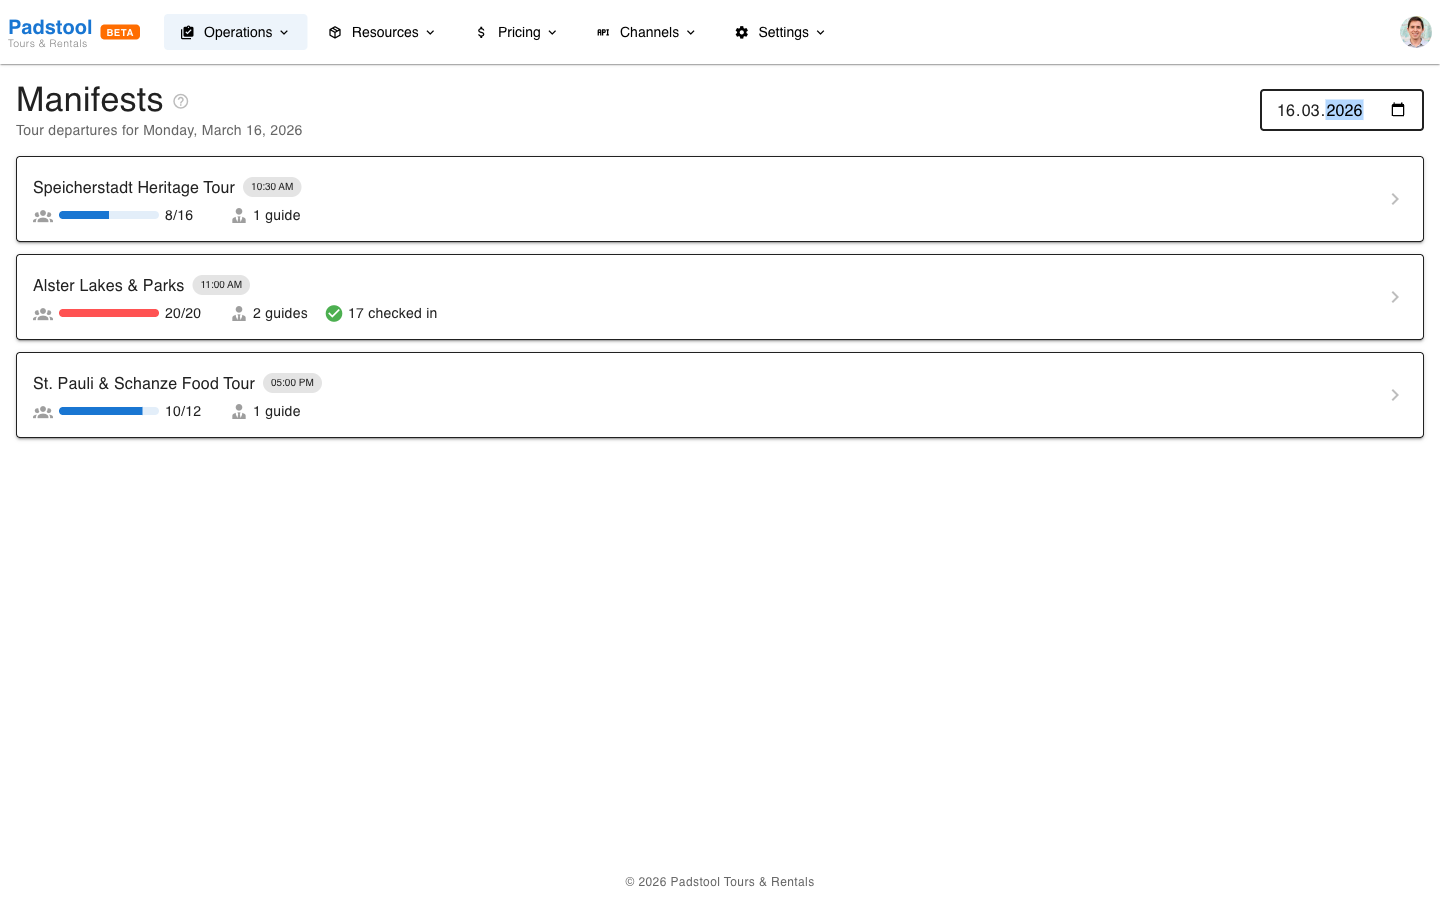
- Capacity bar - Visual indicator showing booked spots vs total capacity. A full red bar means the tour is sold out.
- Guide count - How many guides are assigned to this departure.
- Check-in badge - Appears once customers start checking in, showing how many participants have arrived.
Use the date picker in the top-right to switch between dates. The page defaults to today.
Click any departure card to open its detailed manifest view.
Manifest detail
The manifest detail view is where you manage the check-in process for a single departure.
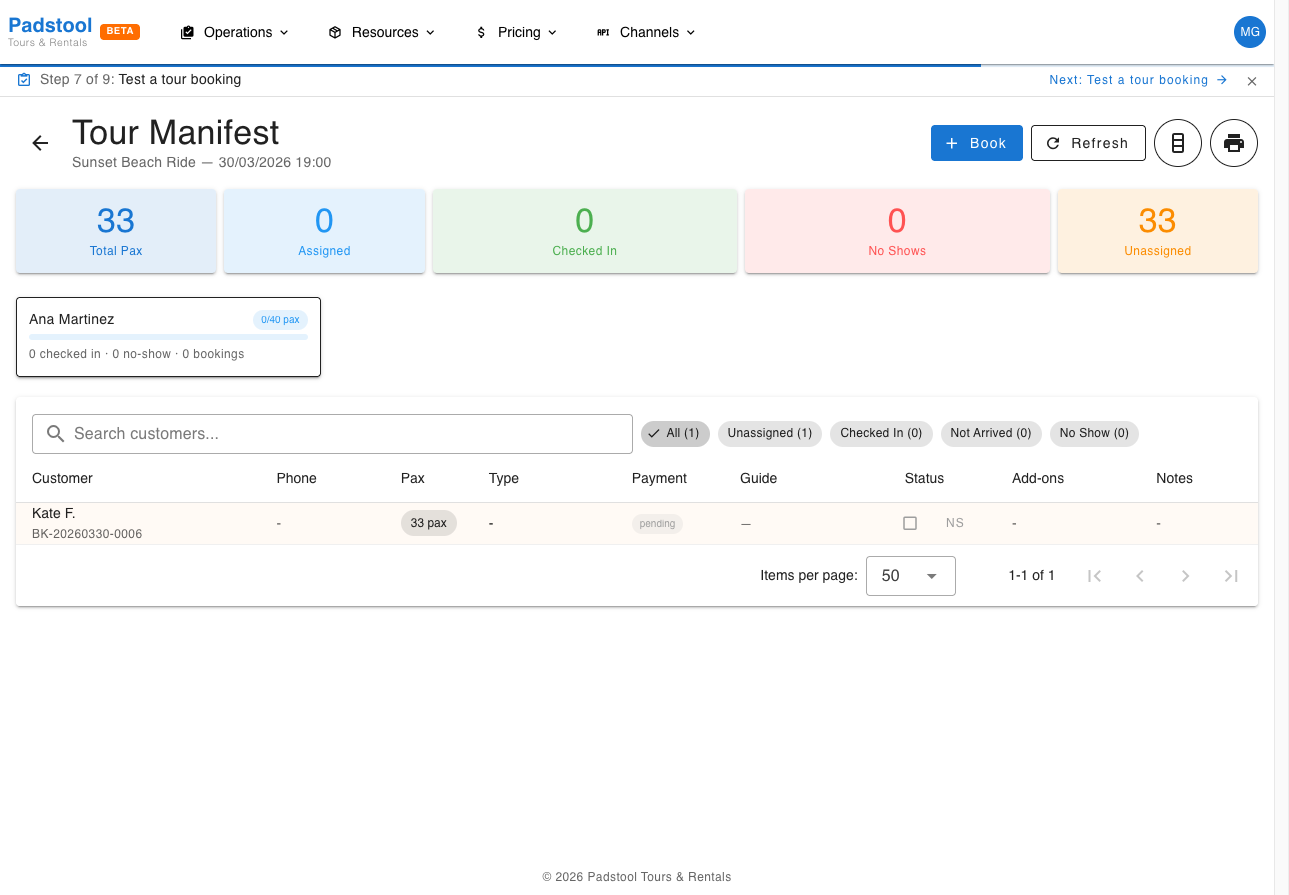
Stats bar
The colored stats cards across the top give you an at-a-glance summary:
| Card | What it shows |
|---|---|
| Total Pax | Total participants across all bookings for this departure |
| Assigned | Participants assigned to a specific guide |
| Checked In | Participants who have physically arrived |
| No Shows | Participants marked as no-show |
| Unassigned | Participants not yet assigned to a guide |
Guide cards
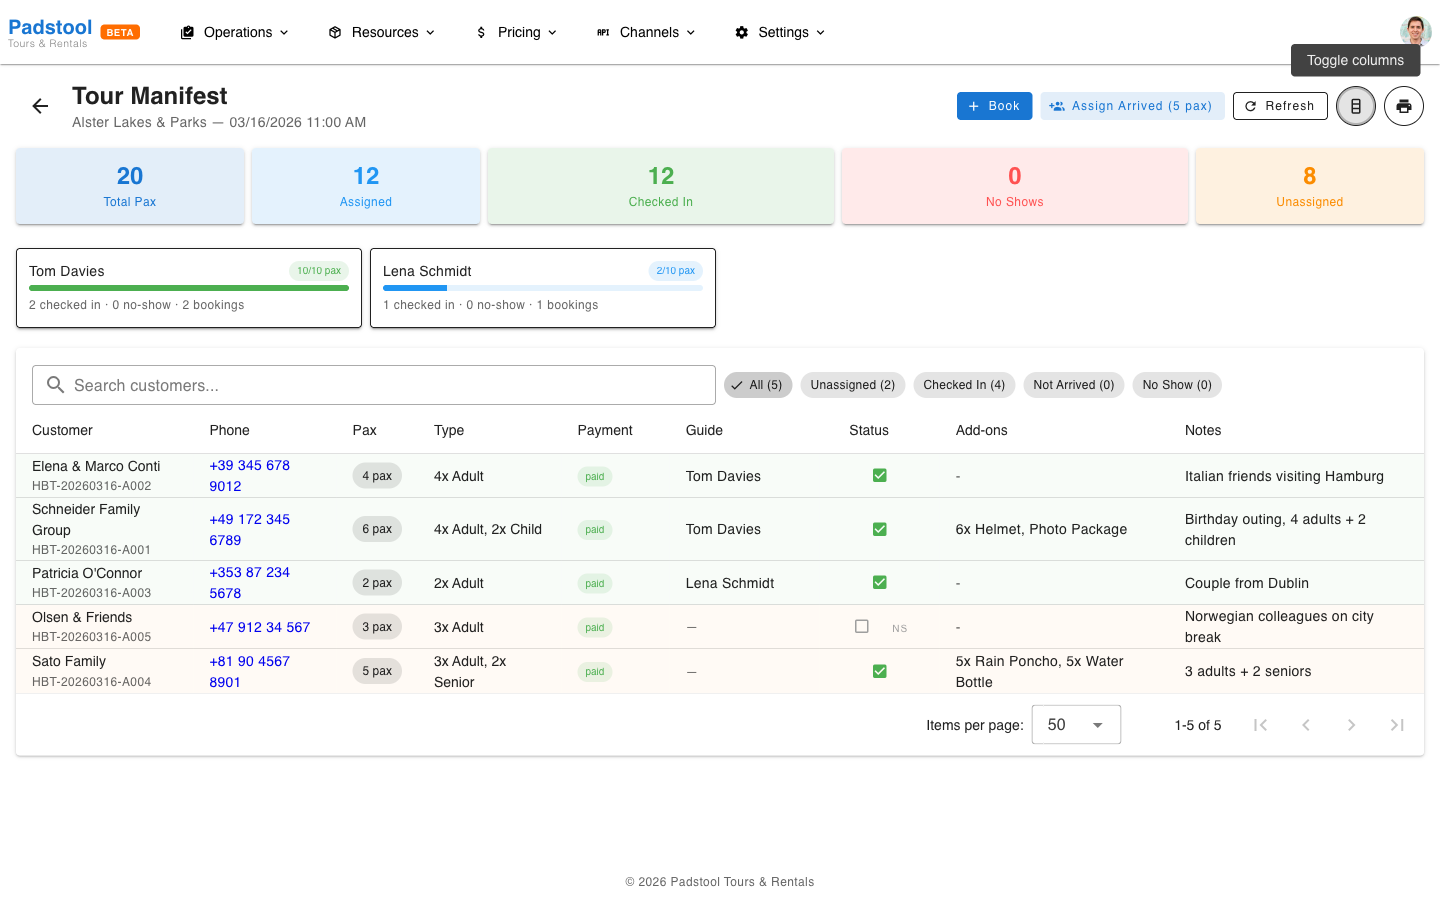
Below the stats, each assigned guide has a capacity card showing:
- Guide name and current load (e.g., 10/10 pax)
- Progress bar indicating how full the guide's group is
- Breakdown of checked-in, no-show, and total bookings
Click a guide card to filter the table to only that guide's participants.
Participant table
The table lists every booking for this departure. Default columns are Customer, Phone, Pax, Payment, Guide, and Status.
- Green checkmark - Customer has checked in (arrived)
- Empty checkbox - Customer has not arrived yet. Click to check them in.
- NS button - Mark a customer as no-show
- Em dash (--) in Guide - Customer is not yet assigned to a guide
Toggling columns
Click the column toggle button (table icon in the header) to show or hide additional columns:
- Type - Price type breakdown (e.g., "4x Adult, 2x Child")
- Add-ons - Booked add-ons (e.g., "6x Helmet, Photo Package")
- Notes - Booking notes from the customer or operator
- Source - Booking channel (Direct, OTA name, etc.)
Filters
Use the chip filters above the table to narrow the view:
- All - Show all participants
- Unassigned - Only participants without a guide assignment
- Checked In - Only arrived participants
- Not Arrived - Assigned but not yet checked in
- No Show - Marked as no-show
Check-in workflow
The typical day-of-tour check-in process:
- Open the manifest for the departure you are managing.
- Customers arrive - Click the checkbox in the Status column to mark them as checked in. This records the arrival time.
- Assign to guides - Once checked-in customers are ready, click Assign Arrived in the header. The system fills the first guide to capacity before moving to the next, getting each guide's group ready to depart as quickly as possible.
- Handle no-shows - If a customer does not arrive by departure time, click NS to mark them as a no-show. This frees up their spot in the guide's capacity count.
TIP
The auto-assign algorithm fills guides sequentially - it loads the first guide to full capacity before assigning anyone to the second guide. This gets the first group out the door as fast as possible, which is especially useful for large tours with multiple guides.
Undoing actions
- Click a green checkmark to undo a check-in (sets the customer back to "not arrived").
- Click a no-show chip to undo the no-show marking.
Adding a booking from the manifest
Click the Book button in the manifest header to create a new booking directly for this departure. This is useful for walk-in customers on the day of the tour.
Printing manifests
Click the printer icon in the header for print options:
- Print Full Manifest - A printable checklist of all participants with checkboxes for field use.
- Print [Guide Name] - A per-guide manifest showing only that guide's assigned participants.
The printed manifest respects your current column visibility settings, so enable the columns you want before printing.
TIP
Print per-guide manifests and hand them to each guide before departure. Each guide gets a checklist with only their assigned customers, phone numbers, and any relevant notes.
Schedule status — how it updates automatically
As you work through the manifest, the tour schedule status updates automatically. You never need to change it manually.
scheduled → in_progress
The schedule moves to in progress the moment every booking is resolved — meaning every customer is either checked in (arrived) or marked as a no-show (no_show), with none left as pending.
| Attendance status | Counts as resolved? |
|---|---|
pending — not yet acted on | No — blocks the transition |
arrived — customer checked in | Yes |
no_show — customer marked as no-show | Yes |
The stats bar at the top of the manifest shows you exactly how many participants are in each state at a glance:

While any booking in the table has a pending status checkbox, the schedule stays scheduled:

As you check customers in, the green checkmark appears in the Status column. When the last pending booking is resolved, the schedule flips to in_progress automatically:

What if you undo an action?
If you undo a check-in or reverse a no-show, that booking goes back to pending. If the schedule had already moved to in_progress, it reverts back to scheduled — because at least one booking is unresolved again.
Automatic transition via cron job
Not every operator completes the manifest before the tour departs. A background job runs every 5 minutes and advances the schedule automatically if all of the following are true:
- The tour's start time passed at least 15 minutes ago (grace period for late starts and operators still checking in)
- The tour has not ended yet
- At least one confirmed booking exists on the schedule
This means even if you never touch the manifest — for example, if you printed it out and managed check-ins on paper instead of using the app — the schedule will still move to in_progress automatically once the tour is clearly underway. You don't need to do anything in the system for this to happen.
in_progress → completed
The same background job marks the schedule as completed automatically once the tour's end time has passed by at least 30 minutes.
Summary
Operator resolves all bookings in manifest
              ↓
  scheduled → in_progress (immediately)

  — OR —

start_time + 15 minutes passes (cron job safety net)
              ↓
  scheduled → in_progress (automatically)

end_time + 30 minutes passes (cron job)
              ↓
  in_progress → completed (automatically)
TIP
The manifest-driven transition is immediate — the moment you check in the last customer, the schedule status updates in real time. The cron job is only a safety net for tours that depart without a completed manifest.
Tips
- Open the Manifests page first thing on tour mornings for a quick overview of all departures and guide assignments.
- Check in customers as they arrive rather than in bulk - this gives you an accurate real-time count of who is present.
- Use the search bar to quickly find a specific customer by name, email, phone, or booking reference.
- Monitor the Unassigned count - if it stays high close to departure, run Assign Arrived to distribute customers to guides.
- Enable the Notes column to see special requests or group details that may affect the tour experience.